A whole year and a bit has passed sinceI started silversmithing and I love it just as much today as I did whenI started.
End of August is the birthday of myoldest and dearest friend Stephanie Rampton (a print maker living in Melbourne).One wall of my lounge is covered with her gorgeous tree prints and I hadthe idea to make her an etched locket pendant based on my favourite printof hers. She is always in my mind, but even more so at the moment becauseon a trip to London a few months ago, she tripped on a kerb and broke bothher hands. She still has both hands strapped up and is desperate to beable to get back to normal and to be able to do her art.
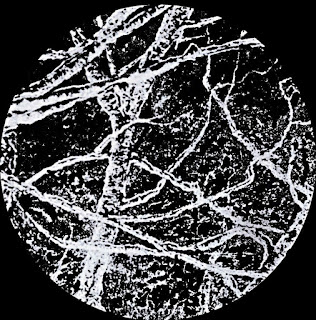
For my birthday she had bought me alarger disc cutter from Cooksongold.com and I wanted to use it for herpendant. I started with a photo of the print, then in paint shop pro, removedbackground, sharpened and reversed it to a negative. I reversed it so thatthe branches would etch and be dark, and the gaps between remain silver.
I have done quite a few etchings withvery little trouble, but not this time! I reckon I tried this etch 5 timesbefore finally getting it to work, and even the final one I wasn't completelyhappy with but was running out of time to get it posted to Australia.
As usual I had a block of wood withsheet of kitchen roll on top, then squeaky clean sheet silver, then laserprinted paper image ink side down, then sheet of kitchen roll on top, thenthe flat of the iron on its hottest setting.
After 5 minutes, nothing had happened.The ink was still on the paper and the silver was bare. Tried it all secondtime, still nothing. The iron was new and had a non stick base - maybeit was that? The paper and ink could be different though the printer wasone I had used before. I tried it again sandwiching the silver and paperbetween my daughters hair straighteners - still nothing. The silver wasstarting to get discoloured and scruffy by this time. So weird that itwouldn't work. Eventually frustrated I bought a new cheap iron with a stainlesssteel base and I got hold of a sheet of OHP transparency. Printed the designonto that and tried it again with the new iron. At last success! (andrelief!).
I have since tried it again with transparencyand old iron and it didn't work. Haven't yet tried paper and new iron combination.I wasn't completely happy with the design on the silver, there must havebeen one or two air bubbles under it which show up a little. I cut my twodiscs of silver using my new present, and stuck them on double sided stickytape to protect the reverse. I used a sharpie to colour in the edges tostop them etching and dropped them into a fresh new mix of ferric nitrateand left it for two hours.
When I took them out they were slightly over-etched,but even worse they had come loose from the sticky tape and the backs hadbegun to etch - not really the look I was going for but too late to startagain and the silver is too precious to waste. I decided there and thenthat rustic was indeed the look I was after!!!
So, I domed them with my stainless steeldoming block and wood punches then sanded the edges (round and round onsandpaper flat on the bench) to make sure they fit together well. Usingthe disc cutter again, I made a smaller disc with centre hole which I solderedinside one the halves of the locket. In theory you could hold a small photobehind it but I just like it for its look.
I had drilled a hole in each of thethree pieces before soldering, and brought the two sides (one now solderedwith the inner ring) of the locket together with a heavy jump ring.
After much polishing and dipping inliver of sulphur to bring out the dark branches I am reasonably happy with.I have hung it from one of my favourite chains, 2.3mm belcher from Cooksongold(approx £5 per foot) and I have attached jump rings and my handmade claspto the ends. I broke the chain a couple of inches in and soldered in asecond jump ring so that it can be worn two lengths. Posted this morning,hope it arrrives before her birthday.


.JPG)
.JPG)

.JPG)


